
The deadlift is one of the most powerful exercises in existence. It builds more total muscle mass, develops more raw strength, and burns more calories than almost any other movement. It’s also one of the most misunderstood and poorly executed. This guide covers everything you need to lift heavy, safely, and efficiently.
Breadcrumb: Blog › Exercises › How to Deadlift with Proper Form: A Complete Technique Guide
Why Everyone Should Deadlift
The conventional deadlift trains the entire posterior chain — glutes, hamstrings, spinal erectors, traps, and lats — along with your core, forearms, and upper back. No other single exercise trains as many muscles under such high load. It directly translates to everyday strength (picking things up off the floor) and is a cornerstone of any serious strength programme.
Setting Up for the Deadlift
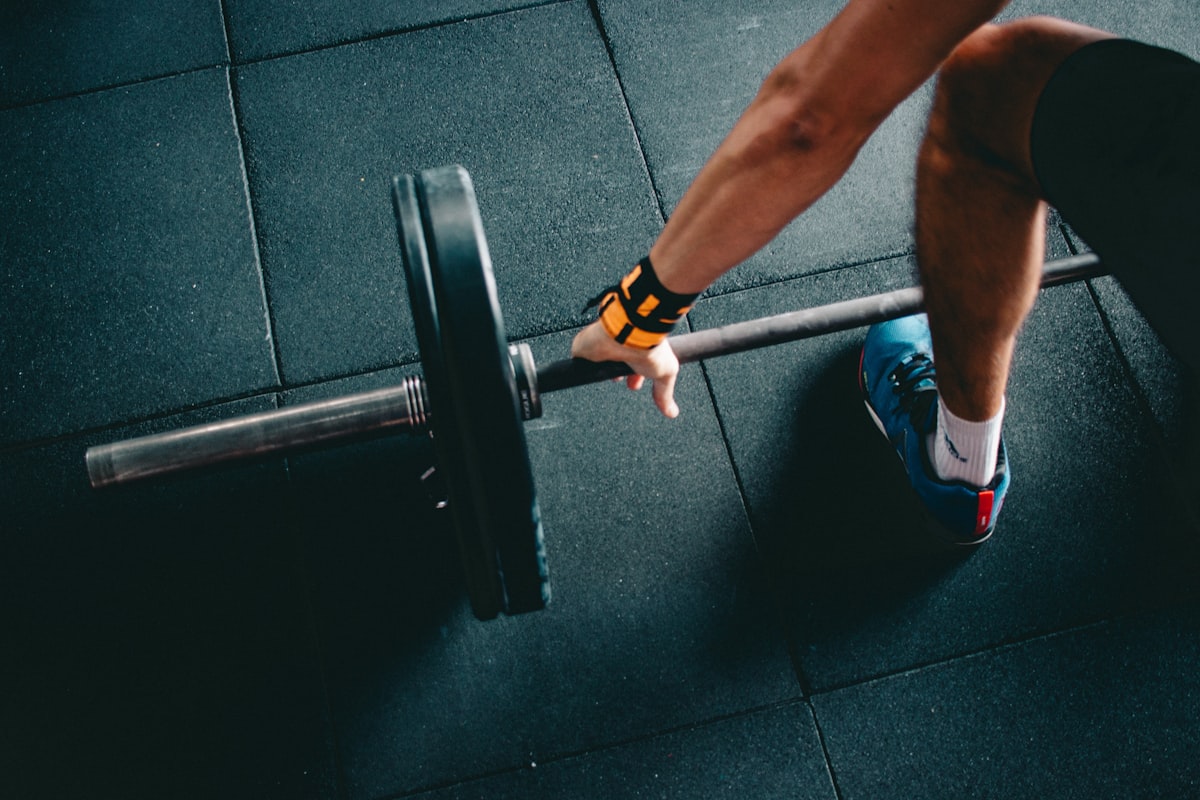
Foot Position
Stand with your feet roughly hip-width apart, toes pointing slightly outward (0–15 degrees). The bar should be over your mid-foot — about 1–2cm from your shins when you look down.
Grip
Grip the bar just outside your legs. Use a double overhand grip to start. As weights increase, a mixed grip (one over, one under) or hook grip helps prevent the bar from rolling out of your hands. If grip is your limiting factor at lighter weights, you’re gripping too loosely.
Hip Position
Push your hips back until you feel tension in your hamstrings, then hinge down to grip the bar. Your hips should be above your knees but below your shoulders — not squatting down low, not standing almost upright. Think of it as a hip hinge, not a squat.
Back Position
Maintain a neutral spine — not rounded, not hyperextended. Take a big breath into your belly, brace your core as if you’re about to take a punch, and “proud chest” — lift your chest slightly to engage your lats. This creates intra-abdominal pressure that protects your spine under load.
The Pull: Step-by-Step
- Step 1: Take slack out of the bar by pushing the floor away before the bar breaks the ground. You should hear a slight click as the bar tensions.
- Step 2: Push the floor away (it’s a push, not a pull) while keeping the bar in contact with your legs.
- Step 3: As the bar passes your knees, drive your hips forward aggressively to lock out.
- Step 4: At the top, stand tall — hips fully extended, glutes squeezed. Do not hyperextend your lower back.
- Step 5: To lower, hinge at the hips first, then bend the knees as the bar passes them.
The Most Common Deadlift Mistakes
1. Rounding the Lower Back
The most dangerous mistake. Caused by weak spinal erectors, poor bracing, or too much weight. Focus on bracing hard before the pull and starting with manageable loads. Controlled rounding (thoracic) is less dangerous than lumbar rounding, but neither is ideal at heavy loads.
2. Bar Drifting Away from the Body
The bar should stay in contact with your legs throughout the lift. If it drifts forward, you’re creating a longer lever and increasing strain on your lower back. Engage your lats (“protect your armpits”) to keep the bar close.
3. Jerking the Bar off the Floor
A jerky start creates unnecessary stress on the lower back and reduces total force application. Instead, build tension gradually and push the floor away smoothly.
4. Squatting the Deadlift
A deadlift is a hip hinge, not a squat. If your hips start too low, your knees will be in the way and you’ll end up squatting the weight rather than hinging through it.
Deadlift Variations
- Romanian Deadlift (RDL): Hinge movement with a slight knee bend. Excellent for hamstring development.
- Sumo Deadlift: Wide stance, more upright torso. Suits lifters with long torsos or hip mobility limitations.
- Trap Bar Deadlift: More neutral grip, easier on the lower back. Great for beginners.
- Stiff-Leg Deadlift: Legs straighter, greater hamstring stretch. More isolation, less total load.
How to Programme the Deadlift
The deadlift has a high recovery cost — it taxes the central nervous system more than most exercises. For most lifters, 1–2 heavy deadlift sessions per week is sufficient. Progressively overload by adding 2.5–5kg when you can complete all reps with good form, or use RPE-based loading to regulate intensity day to day.
Not sure how to fit the deadlift into your overall programme? Zerxus builds a complete programme around your goals and equipment — including the right deadlift variation and loading scheme for your level.
Frequently Asked Questions
Is the deadlift dangerous for your back?
When performed with good technique and appropriate loading, the deadlift is not dangerous for your back. In fact, it strengthens the muscles that protect the spine. Most back injuries from deadlifting result from rounding under heavy load, sudden jerking, or ego-loading beyond current capacity.
Should I use a belt for deadlifting?
A belt enhances intra-abdominal pressure and can allow you to lift heavier loads — but it doesn’t replace good bracing. Learn to brace correctly without a belt first. Introduce a belt when you’re working with heavier loads (typically 85%+ of 1RM) where additional support becomes beneficial.
How heavy should I deadlift as a beginner?
Start with a weight you can lift with perfect form for 5 reps — likely bodyweight or less for most beginners. Focus on technique first. Progress is rapid for beginners; you can realistically add 5kg per week in the early stages when form is dialled in.
Get the next one in your inbox.
Practical insights — no fluff, straight to your inbox.